A Shadow Box + Coordinating Projects Full of Layers, Texture & Detail
There’s something special about a project you don’t just make… you actually display 💛
This design started with simple layers… and turned into something rich, dimensional, and honestly a little magical 🌿✨
If you love building projects piece by piece and watching them come to life, you are going to love this one.
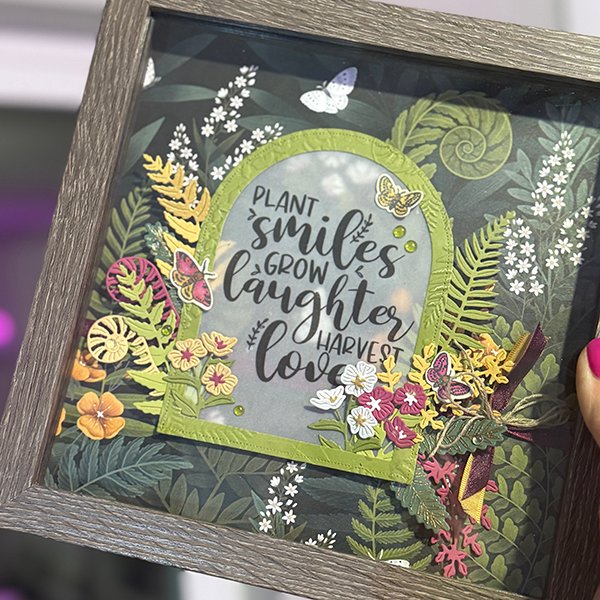
🌿 The Shadow Box Project
The highlight of this class is the 8″ x 8″ wood shadow box… and yes, it’s included in your kit 💛
This isn’t just another card… it’s a piece you can set out and enjoy.
We’ll build it step by step using:
- layered die cuts
- vellum to softly diffuse the background
- texture from embossing folders
- and detailed florals that bring everything to life
It looks intricate… but it comes together in the most satisfying way.
✨ What You’ll Create
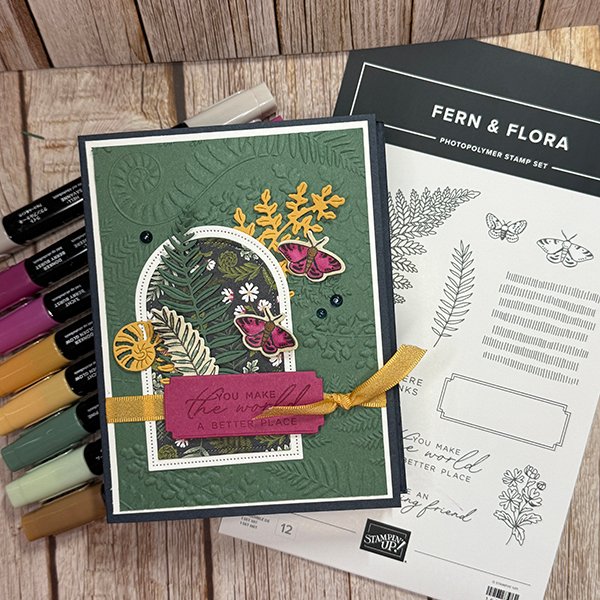
In addition to the shadow box, you’ll create 3 coordinating projects that build on the same techniques:
- Shadow Box Card
- Shadow Box Sampler
- Dimensional Fun Fold
- Designer Paper Feature Card
Each project helps you practice layering, texture, and dimension in a way that feels approachable and fun.

🌿 Techniques You’ll Learn
This class is all about elevating your projects with techniques you’ll use again and again:
- Building depth with layered elements
- Using vellum to soften and highlight designer paper
- Creating focal points with die cut frames and sentiments
- Adding texture with embossing folders
- Working with small detailed pieces (without the frustration 😅)
Everything is broken down step by step so you can enjoy the process… not feel overwhelmed.
✂️ A Little Behind the Scenes
One of my favorite tips in this class is how we handle all those tiny detailed pieces…
Instead of trying to hold them with your fingers and ending up with glue everywhere, I’ll show you how to use your Take Your Pick tool with the putty tip to grab the piece and the stylus tip to apply adhesive for clean, precise placement.
It’s a small shift… but it makes a big difference, especially on projects like this.
💛 What’s Included in Your Kit
Your class kit includes everything you need to create the projects (just add your stamps, inks, and tools):
- Full package of Designer Series Paper
- Dewdrop embellishments (full package)
- 15 yards of coordinating ribbon (Berry Burst, Golden Glow & Peaceful Pine)
- 8″ x 8″ wood shadow box
- Assortment of 12″ x 12″ two-toned cardstock
- All project kits prepped and ready to assemble
And of course… all the Purty ParTAY extras that make these kits a little extra special ✨
🎥 Class Details
- 📅 Register by: May 5
- 📦 Kits ship by: May 15
- 🎥 Live Class: May 23
- 📄 Tutorial + Videos Released: May 27
Join live or craft at your own pace with the recorded videos and full PDF tutorial.
🛠 What You’ll Need
To complete your projects, you’ll need a few basic supplies from your craft stash:
👉 View the full supply list here
Please note:
The Fern & Flora Bundle and the coordinating 2026–2028 In Colors (inks and Stampin’ Blends) used in these projects will be available beginning May 5.
If you’re registering early, you can plan ahead and add these to your order once they release 💛
✨ Ready to Create Something You’ll Actually Display?
If you’ve been wanting to try a project with more depth, texture, and detail… this is a fun one to jump into.
You’ll have everything prepped and ready, plus step-by-step guidance so you can enjoy the process without the overwhelm 💛
👉 Save your spot HERE

I am interested in the pdf for the Ferns and Flora class bu5 can’t find where to purchase on your website
barbrobbins@rogers.com
Hi! All my Tutorials are found in my Tutorial Vault, under the Shop with me Menu. Here is the direct link to Fern & Flora!
https://purtypartay.com/product/midnight-garden-fern-flora-tutorial-collection/